File templates: first steps
The file template add-on can be used to easily upload a template for contracts, certificates, or the like, and have this template filled in automatically with the profile information of the employee.
Here you can use the standard data profiles from the employee profile(employee data), as well as specifically created data profiles. These are then filled in automatically via a file template. This allows you, for example, to quickly and automatically create employee databases with a template for every employee.
The following four steps must be followed to be able to use a file template:
1. Book addon
To use the add-on, you can book it very easily via your account, as follows:
Click on the Papershift logo at the top left-hand side → select "View addons" → click on the tab "Addons" in the overview → here you select "HR"
2. Save data profiles
If you require more than the standard data profiles in the employee profile, you can save custom data profiles as follows:
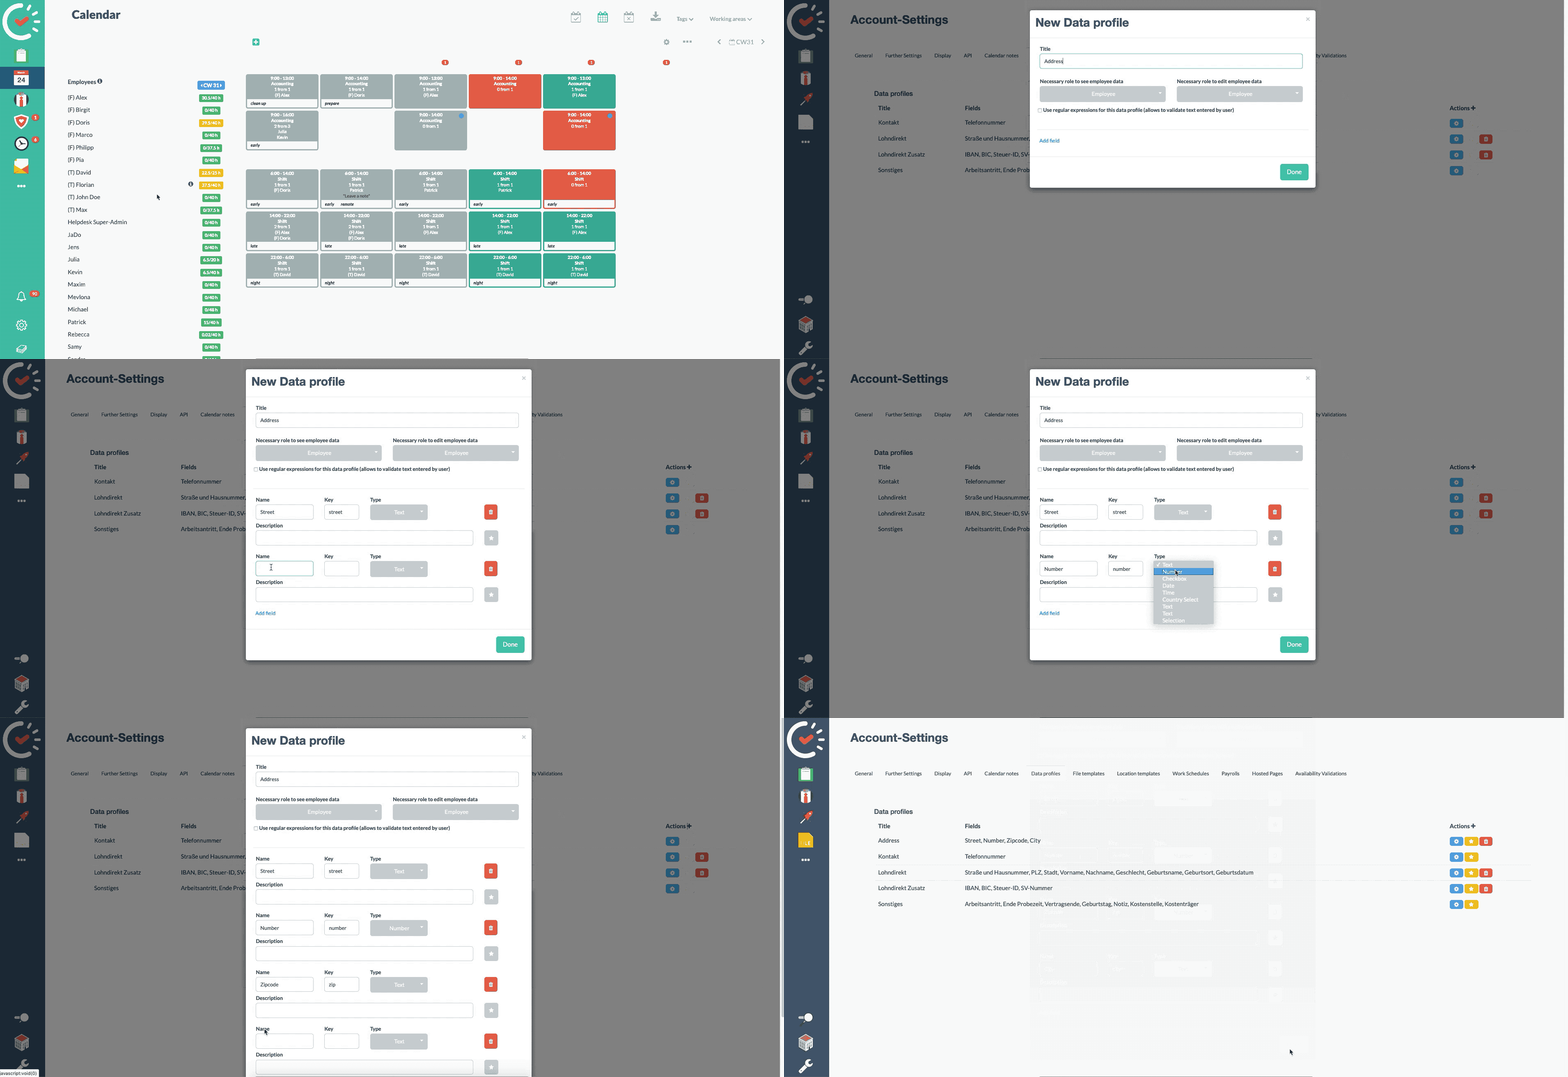
Click on the gear icon on the bottom left-hand side and select "Account settings" → with the tab "Data profiles", you can save a new data record by pressing + next to the actions
You can choose any title. This title (e.g., address) is then displayed in the employee data as a heading.
You can define who has authorization to see and edit the data.
We save a new data record with the button "Add field".
You define which data record you want to save in the input field "Name". To continue with our example of the title address, we need a data profile with "Street".
The key in the same row is important for the file template, which we are going to create later on. We can enter any desired text here, e.g. "street". This key is used as a variable within a Word or Open-Office document, which is then automatically filled in with the data of the employee.
You can select the type you want according to your data record. The street name is supposed to be stored in our example "Street". So we select "Text" from type.
Depending on your requirements, you can now add more fields with e.g., the house number, zip code, and place of residence.
Once all the required data profiles have been stored, click on "Save" to confirm the info.

3. Create file template
You can use Open Office or Word to create a file template with the required variables.
NOTE: For the use of placeholders in the file templates with Word, you use fields from the type "Merge Field". In OpenOffice, you record the variables by means of square brackets and capital letters.
You will find out the details about how these variables are used in OpenOffice and Word in this article: Using placeholders in file templates
To be able to use the data template now, we still need to upload it to our account:
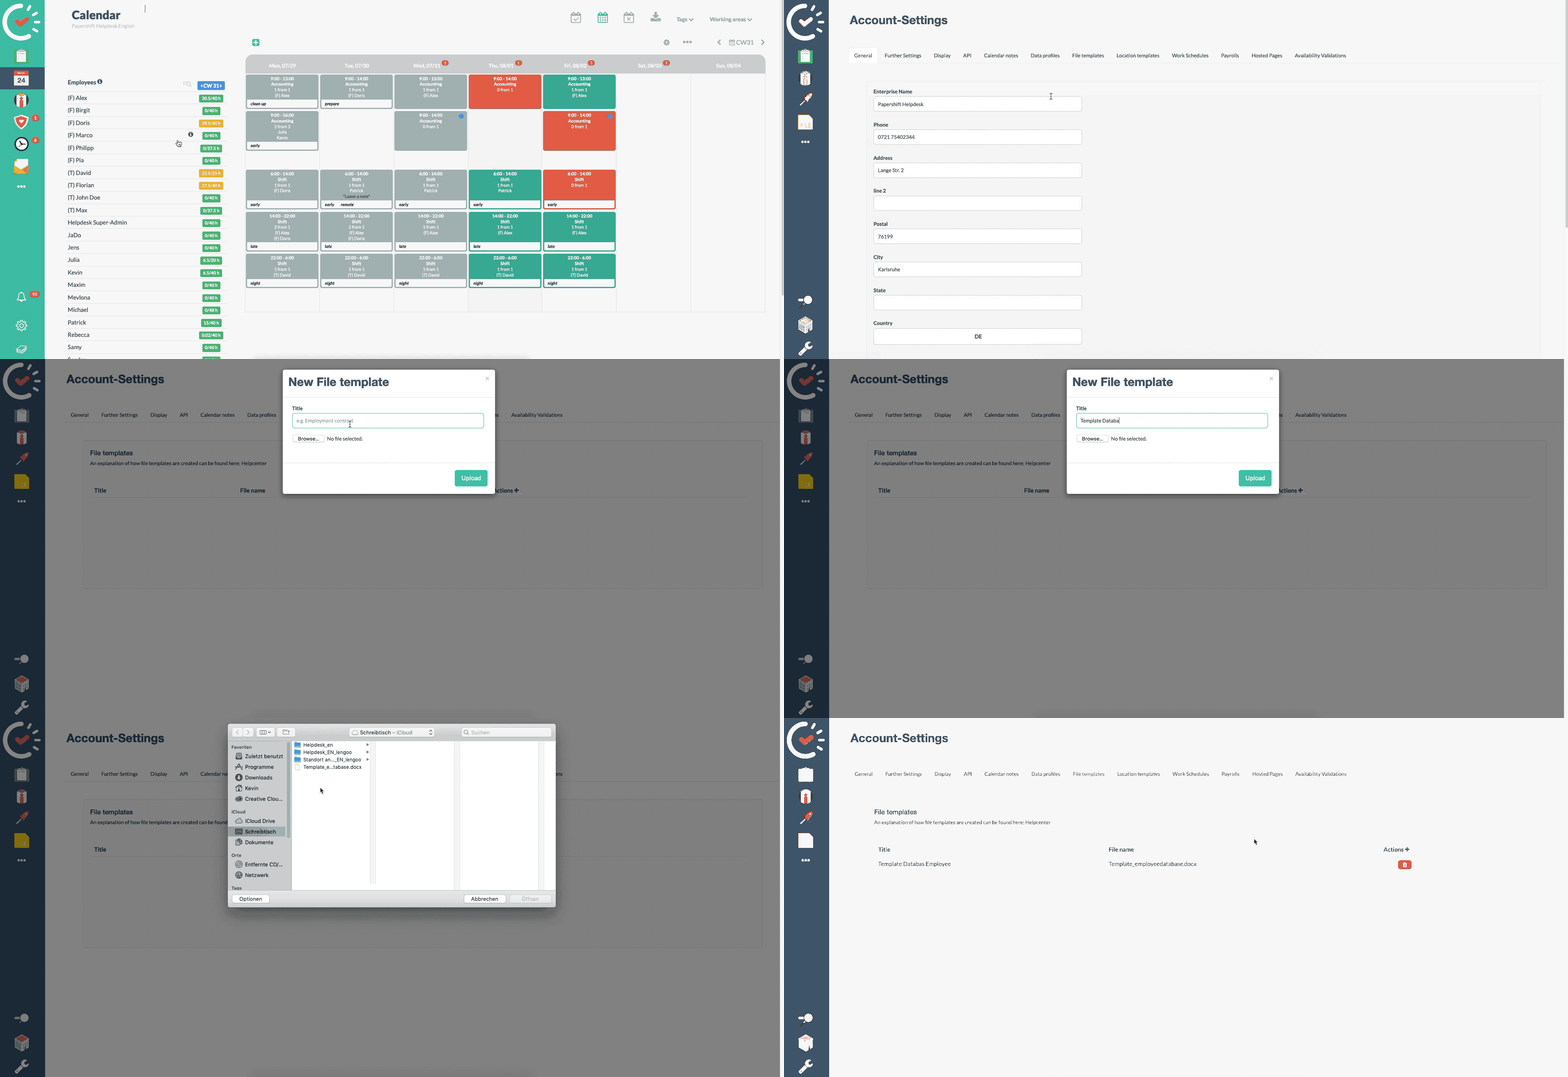
Now click on the + next to the actions section under the tab "File templates".
You can again choose any title here. In our example: Template_employeedatabase.
Now click on "Select file" and choose the file that you stored locally on your PC/laptop with Word or OpenOffice.
By clicking on "Upload", you are storing the file template to your account, which can now be used in the employee profile.

4. Fill in the file template with the employee's data
To now use the file template and to fill it with the data of the employee, proceed as follows:
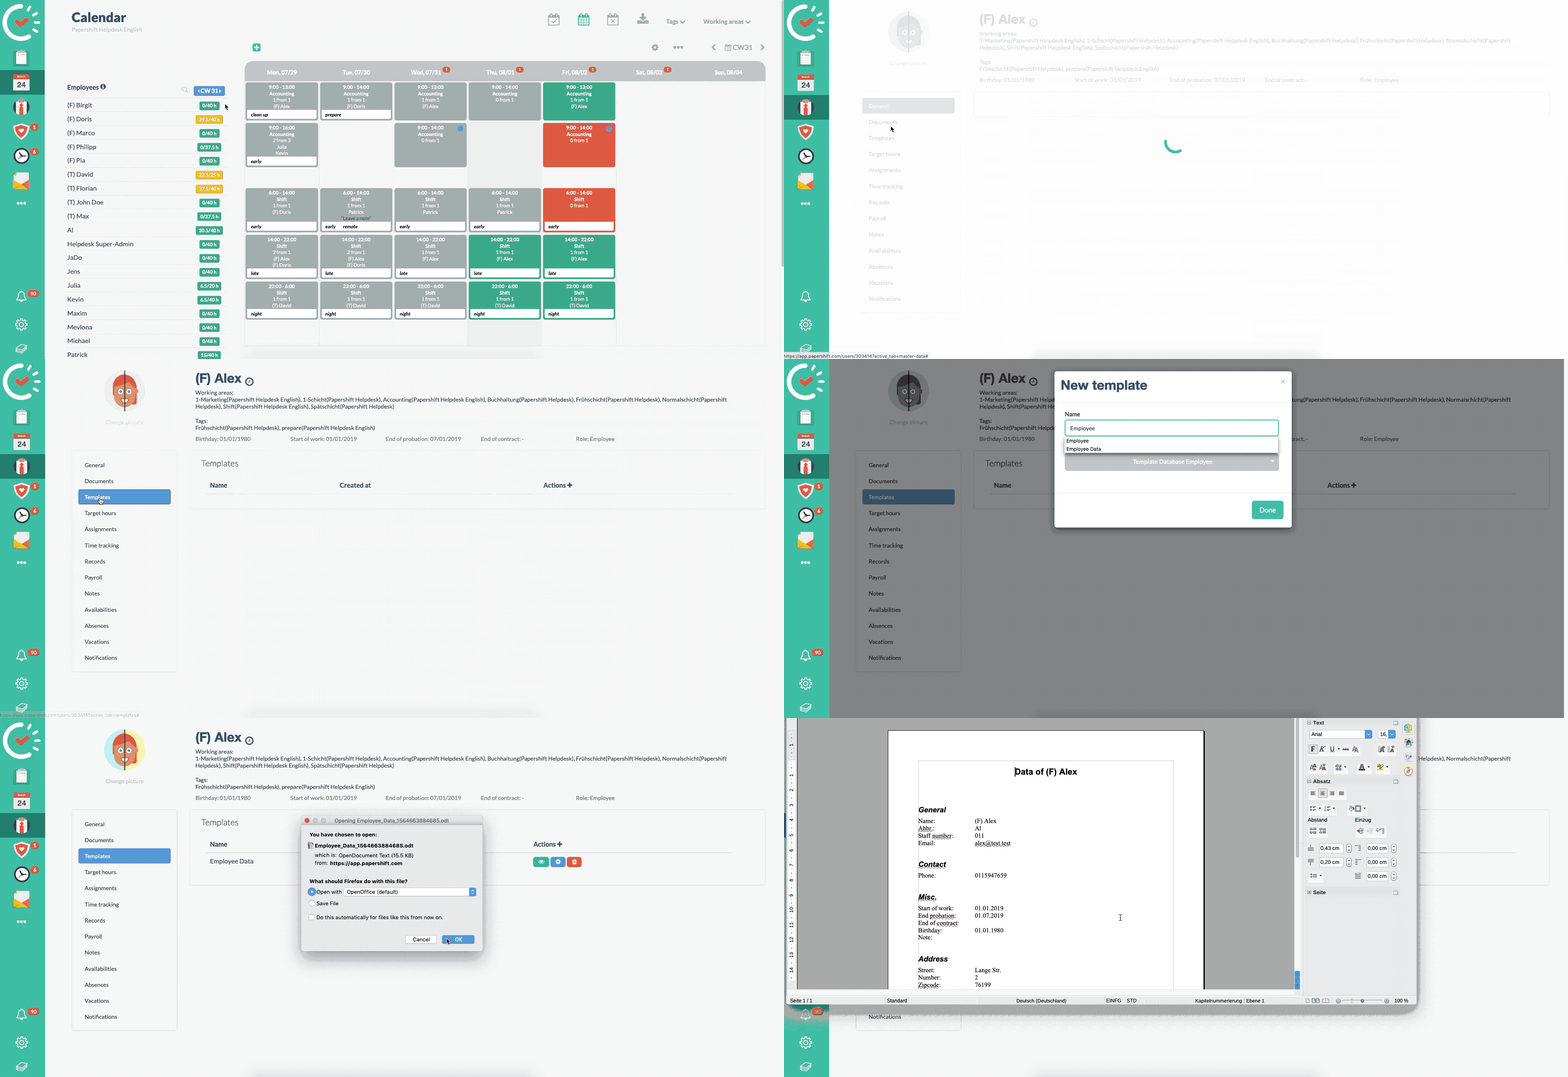
Change back to the desired location → click on the red tie (employee overview) on the left-hand side → click on the name of the employee to call up their employee data.
Make sure that all the provided standard fields and the fields of your own data profiles are filled in.
Click on the tab "Templates" in the menu bar on the left-hand side and then on the + next to actions.
You can specify any desired name in the entry field "Name". For example: Employee database.
You select your uploaded file template under file templates. In our example: "Template_employeedatabase".
Store the document by clicking on save, it then appears in the templates and can be viewed, edited, and downloaded.
The file can be downloaded and viewed using the symbol with the green eye.

As you can see, the file template was automatically supplemented with our employee data.