Assign automatically
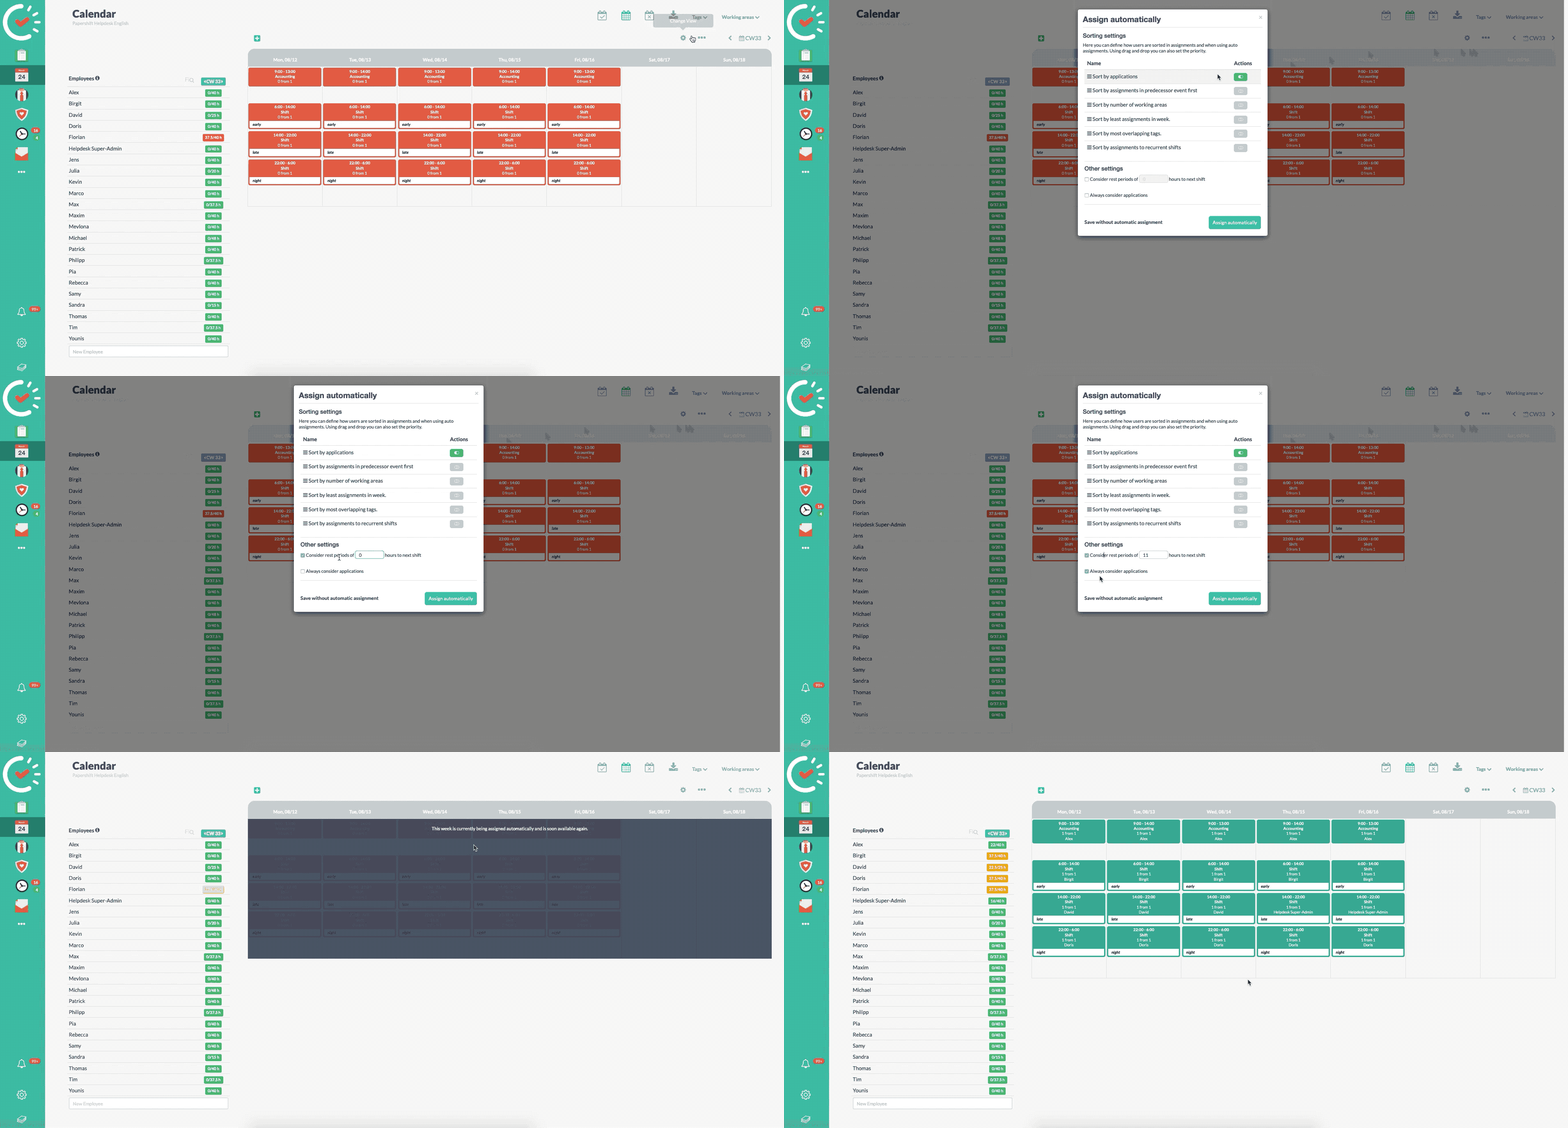
The duty rota can be filled in automatically in one click (from the professional package and up). First record working areas and create shifts .
Click on the calendar symbol on the left → now click on the magic wand above the calendar → select the desired option in the new window and confirm → a dark window will now appear and the shifts are occupied with the employees

The following should be set for the function to work well:
The availabilities should be recorded in the employee profile.
(Red tie on the left → employee name → availabilities)
The availabilities can be recorded by you or by the employee himself.
Create availability:
Info article about the availabilities.
Weekly target hours should be entered in the employee profile.
(Red tie on the left → employee name → target hours → enter weekly hours)
The employees must then also be entered in the applicable working areas of the shifts.
(Red tie on the left → next to the employee name under the row areas →here are the areas to which the employee is assigned)
The actual minimum number should be indicated in the shift.
(In the calendar, click on the gear icon in the shift → then enter the number at employees → save)
When making settings for the employees, the target hours may not be exceeded.
(Red tie on the left → employee name → target hours → place the tick at the bottom)
Additional settings regarding automatic assignments
In the location settings you can find more options that influence the way in which the system automatically assigns the employees.
Click on the gear icon in the left navigation bar (Location-settings) → go to the "Scheduling" tab → under "Sorting-Settings" you will find more options that influence the way in which the systems assigns your employees.

The system now has all the required info and can properly carry out the assignment.